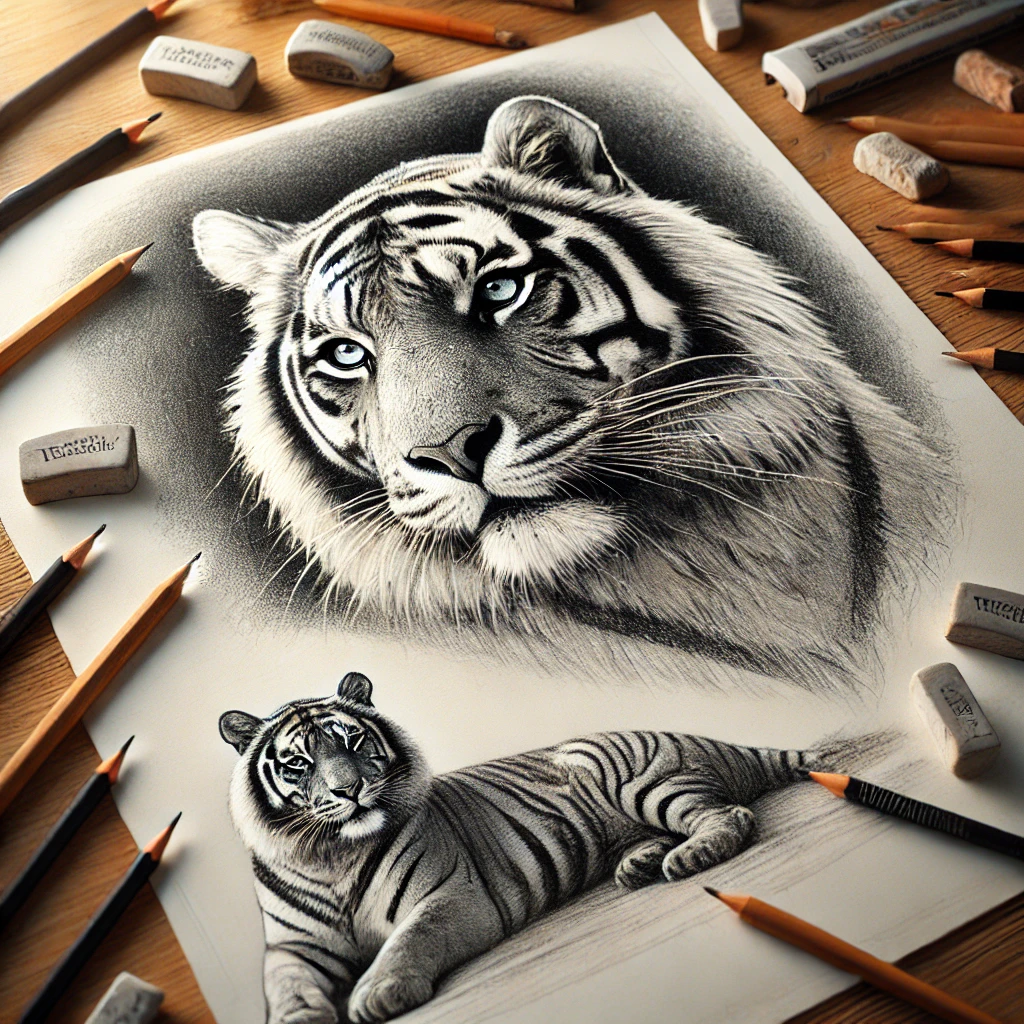
Tigers are majestic creatures known for their strength and beauty. Capturing these qualities in a drawing requires attention to detail, patience, and the right techniques. Whether you’re a beginner or a seasoned artist, learning how to draw a tiger can be both a fun and rewarding experience. In this guide, we’ll walk you through all the essential steps to create a stunning tiger drawing. From understanding anatomy to mastering fur texture, you’ll be equipped with all the knowledge to bring your “Drawing:Xms2zhd83gq= Tiger” to life.
Understanding Tiger Anatomy
The foundation of any good drawing starts with a strong understanding of the subject’s anatomy. Tigers have a muscular build with powerful limbs, a broad head, and a long tail. These features contribute to their strength and agility. By grasping the anatomy, you can ensure that your tiger drawing looks realistic and accurate.
Key Aspects of Tiger Anatomy:
- Head and Face: The tiger’s head is broad, with small, rounded ears and sharp eyes. The eyes are almond-shaped, which gives tigers their fierce expression.
- Body Structure: Tigers have robust bodies, with strong shoulders and chest muscles. Their hind legs are slightly smaller but equally powerful, enabling them to leap great distances.
- Tail: The tail is long and often curves slightly, helping with balance.
Tools You’ll Need for Drawing:Xms2zhd83gq= Tiger
Having the right tools can significantly improve your drawing process. You’ll need:
- Pencils: A range of pencils from 2H for light lines to 6B for dark shading.
- Erasers: Kneaded erasers are great for lifting graphite, while precision erasers help with fine details.
- Blending Tools: Blending stumps or cotton swabs can smooth out shading for a more polished look.
- Paper: Smooth paper works best for detailed work, while textured paper can add character to your tiger drawing.
Step-by-Step Guide to Drawing a Tiger
Step 1: Start with Basic Shapes
Begin by sketching the basic shapes of the tiger. Use circles and ovals to outline the head, body, and limbs. This stage is all about getting the proportions right. Don’t worry about the details yet. You just want to capture the overall form.
Step 2: Refining the Head and Features
Once the basic shapes are in place, start refining the tiger’s head. Focus on the eyes, nose, and mouth. Draw the ears as small rounded triangles on top of the head. Add in the almond-shaped eyes that give tigers their signature look.
Step 3: Drawing the Body and Limbs
Next, move to the tiger’s body. Outline the shoulders, chest, and back legs. Make sure the front legs are thicker than the back legs. Tigers’ legs are muscular, so be sure to show that in your drawing.
Step 4: Capturing Fur Texture
The fur is what makes a tiger stand out. Use short, quick strokes to mimic the texture of fur. Around the face, the fur is softer, while along the body, the fur appears thicker and longer.
Step 5: Adding the Tiger’s Signature Stripes
Tigers are known for their beautiful stripes. These stripes follow the contours of the body and are irregular in size and shape. Start by drawing stripes around the face, then extend them along the body. Make sure they curve naturally to follow the tiger’s form.
Shading Techniques for Realism
Shading is crucial to make your tiger drawing look realistic. Start by identifying your light source. Areas closest to the light will be lighter, while those farther away will be darker. Use soft pencils for smooth shading and blend with a stump or cotton swab to create gradients.
Key Shading Tips:
- Eyes: Add depth to the eyes by shading around the iris and leaving a small highlight to mimic light reflection.
- Fur: Use darker shading for areas under the body or where shadows would naturally fall. This will give your drawing a more three-dimensional look.
Common Mistakes to Avoid When Drawing Tigers
When drawing a tiger, it’s easy to make common mistakes that can throw off the entire drawing. Here are a few pitfalls to watch out for:
- Incorrect Proportions: If the head or limbs are too large or too small, the tiger will look unrealistic. Constantly check your proportions against reference images.
- Overcomplicating Stripes Early: Start with the tiger’s form first, and add stripes later. This ensures the stripes flow with the body’s shape.
- Forgetting About Light Source: Always keep in mind where your light source is coming from when shading.
Different Styles of Drawing:Xms2zhd83gq= Tiger
There isn’t just one way to draw a tiger. You can experiment with different styles depending on your artistic preference:
- Realistic: Focus on capturing the true proportions, fur texture, and shading to make the tiger look lifelike.
- Cartoon: Simplify the anatomy, exaggerate features like the eyes or paws, and focus on bold, clean lines.
- Abstract: Use the tiger’s form as a basis but incorporate unusual colours, patterns, or shapes to make a unique interpretation.
Inspiration from Tiger Art in History
Throughout history, tigers have appeared in various forms of art, symbolising strength, bravery, and royalty. Artists in ancient China and India often used tigers as motifs in tapestries, sculptures, and paintings. Looking at historical representations of tigers can inspire your drawing.
How to Develop Your Own Style for Drawing Tigers
As you practise drawing tigers, you’ll naturally develop your own style. Don’t be afraid to experiment with different techniques or tools. Try using coloured pencils, charcoal, or even digital tools to see what works best for you.
Practice Exercises for Improving Your Tiger Drawing Skills
To become a better tiger artist, practice is key. Here are a few exercises to help improve your skills:
- Sketch Different Poses: Draw tigers sitting, walking, or mid-pounce. This will help you understand their movement and anatomy better.
- Focus on Specific Body Parts: Practise drawing just the eyes, paws, or tail to master these individual elements before combining them in a full drawing.
FAQs: Drawing:Xms2zhd83gq= Tiger
- What is the best type of pencil for drawing tigers? A variety of pencils, ranging from 2H to 6B, will give you the best range of light and dark tones.
- How can I make my tiger drawing more realistic? Pay close attention to shading, fur texture, and the tiger’s anatomy. Use reference photos to guide you.
- How long does it take to draw a tiger? Depending on the level of detail, it can take anywhere from 2 to 4 hours to complete a realistic tiger drawing.
- Should I use a reference image? Yes! Reference images will help you capture the correct proportions and details.
- Can I add colour to my tiger drawing? Absolutely. Once you have the basics down, you can experiment with coloured pencils or markers to add more depth and realism.
Conclusion
Drawing:Xms2zhd83gq= Tiger can seem challenging at first, but with practice, it becomes an enjoyable and rewarding experience. By understanding the tiger’s anatomy, using the right tools, and paying attention to shading and texture, you can create a lifelike representation of this magnificent animal. Keep practising, and don’t be afraid to try new techniques or styles as you develop your artistic skills.